
When Intel released it’s iCore CPUs a few years ago, it was a huge step forward in processing power. Reading up on how overclockable the the entry level i7 was, I ordered my own and built a new desktop around a new i7-920 and GeForce 285. And it was awesome and powerful, but loud and hot in my office. However, in 2009, noise and heat were expected if you wanted game on your PC, so a warm office was the norm.
Fast forward to 6 months ago when I replace my Tivo with a HTPC. Because the HTPC would reside in the living room, I researched and purchased components that got good reviews for being quiet. That said, I never expected it to be dead silent. Thanks to an ivy-bridge i5-3570K processor, a SSD, a quiet case, and a silent power supply it makes negligible noise. One can hear the CPU fan if you put your head behind the HTPC but not otherwise, so for practical purposes it is a silent PC. Which got me thinking about the aging beast in my office.
Armed with a Kill-A-Watt and a dream, I set out to fix my desktop’s heat and noise problem…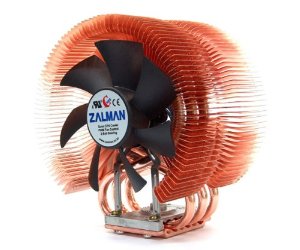
At the end of 2010 I had upgraded my graphics card to the ATI HD6950 for two reasons. First, it let me game on across 3 screens thanks to eyefinity support. Second, it was quieter and had a lower power draw than the vacuum-cleaner-sounding GeForce 285 (OK that might be a slight overstatement). That and the addition of an SSD as my main drive were the only changes to my still potent rig. But the silence of my HTPC raised my expectations and the constant whirring of fans became painfully more noticeable.
First, I attacked the CPU problem by replacing the stock cooler with a quieter Zalman one. Playing around with my CPU overclock settings I discovered that the i7-920 overclocking to 3.2Ghz used 40 more watts of power and ran 11C hotter at idle than the stock 2.6Ghz. However, reducing the OC to 3.0Ghz only used 1 additional watt and only ran 1C hotter at idle. The lower OC was also 15C cooler at full load (84C vs 99C). This was a step in the right direction, but even with these savings my desktop was still pulling 189W idling with the monitors asleep (best case). Compared to my HTPC that used only 43W idling and <60W while in use, I still had a way to go.

Unplugging all my case fans one by one help me located my next biggest offender: my power supply. This was an easy fix since I had been very impressed with the KingWin Lazer Platinum Series 550 watt power supply that I had used in my HTPC. It has two settings for it’s fan: extremely quiet and off. Seriously. It acts as a passive PSU in my HTPC. I keep the fan on in my desktop since the thermal requirements are higher but wow what a difference. More amazing than that is the efficiency of the thing. Its 80 PLUS Platinum High Efficiency is no joke and it dropped my idle power draw to 168W. That’s 21W of pure heat waste removed.
Next up was my graphics card. In my research on GPU power draws I discovered an oddity: The HD6000 series didn’t truly idle with more than 1 monitor. I verified this on my machine and found it was running at 50% of max clock with 2 or 3 monitors attached. This meant it was running 10C hotter at idle (58C vs 48C) and using 40 extra watts to be attached to an extra monitor. This was even if the monitor and signal were asleep. Dropping back to a single monitor dropped my idle load down to 128W, but wasn’t a practical solution as extra monitors are a must for productivity.
 Enter the ASUS GTX660 DC2O. The GTX660 was a sweet spot for power usage as it is the fully implemented version of NVidia’s mid-grade chip and ASUS made the quietest version of it according to reviews. Also this card also offered a 20% boost in gaming performance even with that less power and noise. The new GPU reduced my idle power draw to just 125W (with multiple monitors) another 41W savings. The card also idles at just 39C and is inaudible (because of the the CPU fan) unless intensely gaming. Even then the CPU fan is usually louder than it due it’s added load. Gaming power draw fluctuates a lot but the GTX660 seems to use 15-35W less at the same setttings.
Results: So 3 upgrades and some tweaking later and my desktop is considerably quieter and it’s idle power draw has dropped from 229W to 125W. Since at idle my computer is doing the same amount of work, all of that power difference was simply heat waste. It takes approximately 39W of to raise 1,000 cubic feet of air 1 degree Fahrenheit. My office is closer to 1300 cubic feet so that 104W translates into 2F cooler in my office. That is substantial because that’s a 2F difference while my computer is sitting there doing nothing. So when I walk into the office to start working I’m already better off and those differences continue through my now much cooler and quieter day.