Breathe New Life Into Your Aging Laptop

My brother’s four year old Dell laptop was really starting to show it’s age running (or attempting to run) today’s software.  Boot times had grown long enough to brew coffee and programs were becoming unbearable to launch. So we set out to see just how much of a difference a few affordable upgrades could make to real world performance.

Original System: Dell Latitude D620

  • 1.66GHz Centrino Duo
  • 1GB RAM
  • 40GB HD (5400RPM)
  • Windows XP

Upgrades ($165)

  • Increase RAM to 2GB RAM
  • Kingston SSDNow V Series 64 GB Solid State HD replacement

Our testing methodology was simple:  Use a stopwatch to time a few real world activities and see if the upgrades made a significant difference.  While a stopwatch can add a small amount of “user error” to the times, if an upgrade couldn’t overcome this +/- 1 second variability it isn’t worth the money anyway right?

For consistency, prior to testing the laptop was booted up and we made sure everything was updated, the virus scan had run, backup software was currently done, etc.  We didn’t want some rogue background process skewing our results.

The first three numbers in the chart are a continuous time.  The notebook was booted up and IE was clicked when the network popup confirmed connection – loading the Netflix web page.  Launching the browser as part of the test not only shows time to get online, but how long until windows was truly ready to do something (not simply displaying the desktop while loading stuff in the background).

Original 2GB RAM RAM & SSD
To Login Screen 0:43 0:44 0:21
Desktop Loaded 1:22 1:05 0:31
Web Page Loaded 3:45 3:11 0:53
Launch iTunes 3:15 1:50 0:12

The results speak for themselves.  Additional RAM is a worthwhile upgrade – especially because it is so cheap these days. But even for an older notebook, a SSD steals the show and can make a world of difference in your computing experience. In many cases, an older laptop is perfectly suited for a SSD upgrade as the user is already used to a relatively small HD capacity and won’t have to shell considerably more money out for the larger sized models.

My brother did note one side effect of the SSD:

One thing. When the cooling fan isn’t running, it’s kind of unnerving. I mean, I can see the light for the hard drive cranking, but there’s no noise. Black magic.

PyTivo Install Instructions

I love pyTivo but the windows install instructions are getting a bit spread around for new users… so here’s the best I could bring it together:

  1. Download & Install Python 2.x using defaults (3.x doesn’t work) http://www.python.org/download/
  2. IF you want to use the photo plugin (requires 32bit Python) install it too http://www.pythonware.com/products/pil/index.htm
  3. Download & Use the outdated but setup friendly pyTivo-wmcbrine-2009.03.19-RC1.zip windows installer http://pytivo.sourceforge.net/forum/updated-windows-installer-2009-03-21-t512.html#3957
  4. Download the latest .zip version (top right of shortlog) of pyTivo to updated the files from #3 http://repo.or.cz/w/pyTivo/wmcbrine.git
  5. Shut down pyTivo if running (may be running as a windows service)
  6. Extract the .zip over the existing \Program Files\pyTivo\ (this should overwrite the old files)
  7. Grab the latest build of ffmpeg (currently 1.01) from 2nd post in this thread http://pytivo.sourceforge.net/forum/rdian06-s-ffmpeg-builds-t468.html
  8. Extract the .zip and overwrite the old ffmpeg.exe in \Program Files\pyTivo\bin\
  9. IF you want to be able to push .tivo files grab the special version of tivodecode in this thread http://pytivo.sourceforge.net/forum/tivodecode-support-t831.html
  10. Drop tivodecode into \Program Files\pyTivo\bin\.  To use tivodecode you must set your Media Access Key in your pyTivo.conf under the Server section (“tivo_mak”).
  11. Add a Windows Firewall exception for UDP 5353 so that Windows won’t block pyTivo’s new zeroconf share announcements.  (The most common reason pyTivo shares don’t show up or disappear from the Now Playing list on the Tivo is firewall blockages)
  12. Move the pyTivo.conf file from \Shared Documents\pyTivo\ to \Program Files\pyTivo\
  13. Startup pyTivo & enjoy!

rdian06’s Notes: In later wmcbrine versions, the web interface has been restructured. The web admin plugin has been split into two parts: configuration and TivoToGo. Likewise, the Push and TivoToGo interfaces are hidden by default.

  • An Admin section is no longer needed in your pyTivo.conf you may remove it.
  • To make the TivoToGo web interface visible, you need to add your tivo_mak and togo_path to the Server section of the pyTivo.conf.
  • To make the Push web interface visible, you need to add the tivo_username and tivo_password settings to the Server section of your pyTivo.conf.

Without those settings, the TivoToGo and Push parts of the web interface are not usable and therefore automatically hidden.

Other Tips:

Longitude and Latitude on Google Maps the Easy Way

There are times in life you want to find the longitude and latitude of a known location.  Google maps does everything else well – why not this?  Soon you discover that what was once a feature of GMaps is now gone.  Searching the web brings up a way to center the google map and grab the url and paste it into a javascript and … who has time for all that nonsense???

Here’s the easy way:  Go here and click on the map. Done.

You can even change the default location by clicking the “set” button and bookmarking the new url.

iPad Alternatives

Today is the day that many have longed for since the announcement of the ifamous iPad! However if you are less than impressed with the XL iPod Touch… I have compiled a pretty complete listing of your other options that are currently -or soon to be- out.

To limit the scope of an otherwise giant listing, I have only compiled slate style (keyboardless) devices with screens of 5 to 12 inches.  If I missed one let me know at staff [at] this domain.com and I’ll add it in.

We’ve added a link at top of the site for easy reference.

Lenovo Mini Wireless Keyboard Review

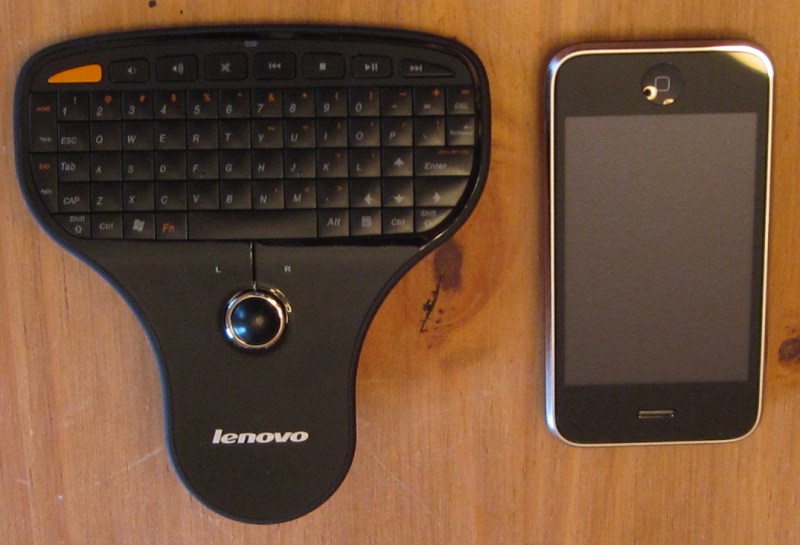
lenovo-remote.jpgI just got my hands on the new mini keyboard from Lenovo today.  Targeted at HTPC setups, this wireless wonder solves the problem of needing full PC controls in a remote form factor.  But does it work as well as one would hope?  Mostly.

Overall

The overall feel of the device is nice.  It fits in your hand as you would expect from  a well made remote.  The underside is a soft matte plastic that I wish they had continued on the top of the device.  The shiny black plastic around the trackball isn’t nearly as supple and quickly accumulates fingerprints (see pic below).  At 126 grams with batteries the device is noticeably lighter than a Tivo remote (164 grams).  The fact that you don’t need a driver disk is another bonus.

Wireless

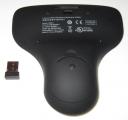
The Lenovo N5901 uses 2.4G wireless promises up to 10 meters of range, and in my testing I had no problems at 23 feet or even at 27 feet through a wall.  At 35 feet and through two walls the controls would work sometimes. Needless to say, if your media room is larger than this thing’s range – you can afford a much more elaborate solution.  The fact that the micro transmitter fits inside the battery compartment is a nice touch especially if you are using this for on-the-road power points instead of sofa surfing.

Keyboard

Levovo is famous for keyboard quality and this mini is no exception.  The keys are straight off any good texting device, and provide solid feedback when thumbing away.  However, since this “media remote” is targeted HTPC use, I would have like to see back lighting on the keys.  Which would come in handy during dimly lit movies.  The media buttons across the top are a welcome addition.  The orange button launches your “my computer” window – good for easy DVD access or an extra HD filled with media.

Trackball

This is the most disappointing part of the otherwise top notch package.  The trackball seems cheaper than the rest of the device.  The feedback is just a tad off.  It can both seem too jumpy when clicking a link and too slow when moving around the screen.  Again this isn’t a huge issue, it is just not a smooth as you would expect.  Another problem is that trackball is too tall. (see pic below)  It is too easy when right clicking to hit the track ball and move the curser. (Lefties would have the opposite problem)  A slightly larger trackball sitting lower probably would have reduced this problem.  And the Lenovo eraser nub may have been the best solution.  Though it may have been price considerations that left that off the table.

lenovo-remote-back.jpg lenovo-remote-finger-prints.jpg lenovo-remote-side.jpg

Conclusion

Is the Mini Wireless Keyboard perfect? No. However considering the other options on the market, you’d be hard pressed to find a better solution anywhere near the $60 list price. Watch for a coupon from ThinkPads.com and it becomes an easy decision.